Finally got hull #1 in the shop and all my tools moved around. After many hours in the thinking chair, I have a plan of attack.
- Add the shear strips
- Fit the bulkheads starting at the bow and moving aft
Ok, so I should have marked the shear line when I still had the boat on the forms. I actually did buy sanded the mark off. So back to placing the forms in the hull and marking the shear line. Once that was done it was quick work to scarf the sheer strip, radius the bottom of it and glue it in place with epoxy. The nice thing about sharing a boat building garage, is now I have access to twice as many clamps!
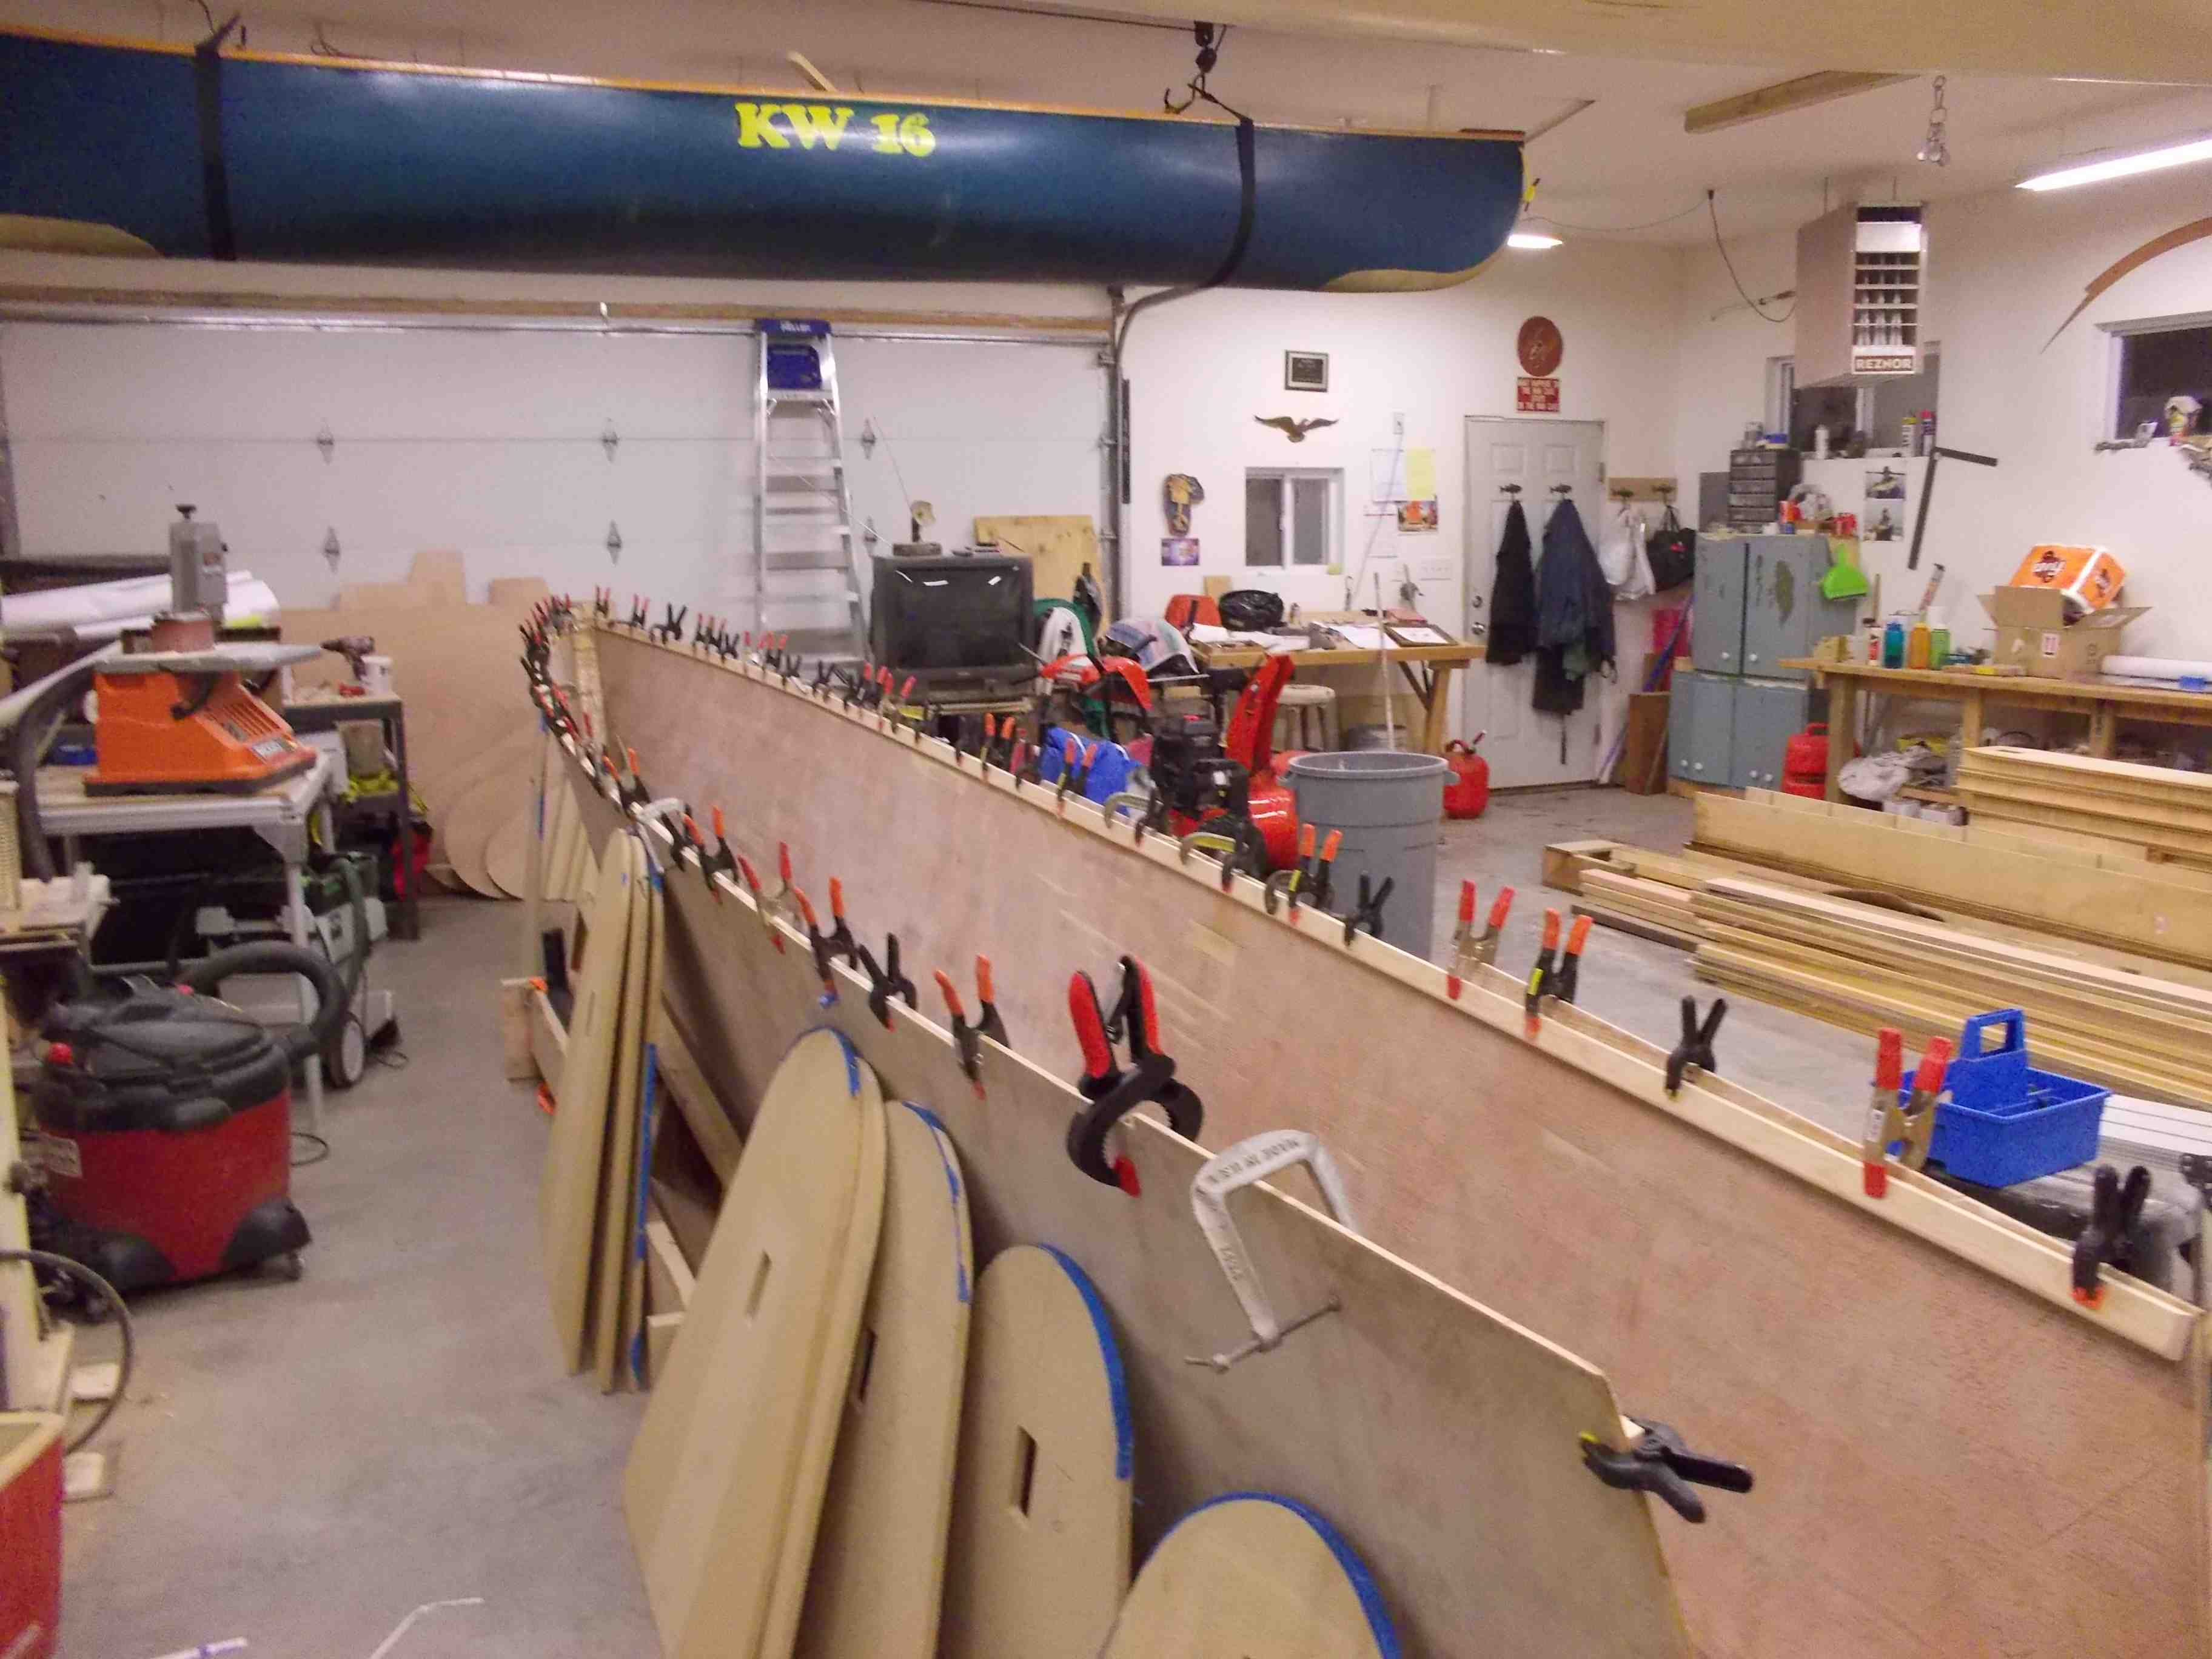
This is an excellent time to make sure your sheer flows smoothly and adjusting it before the glue hardens. Notice that I added a radius to the bottom of the strip before glueing.

Once the epoxy hardened I ran my router with a pattern bit and trimmed the excess hull to the sheer strip.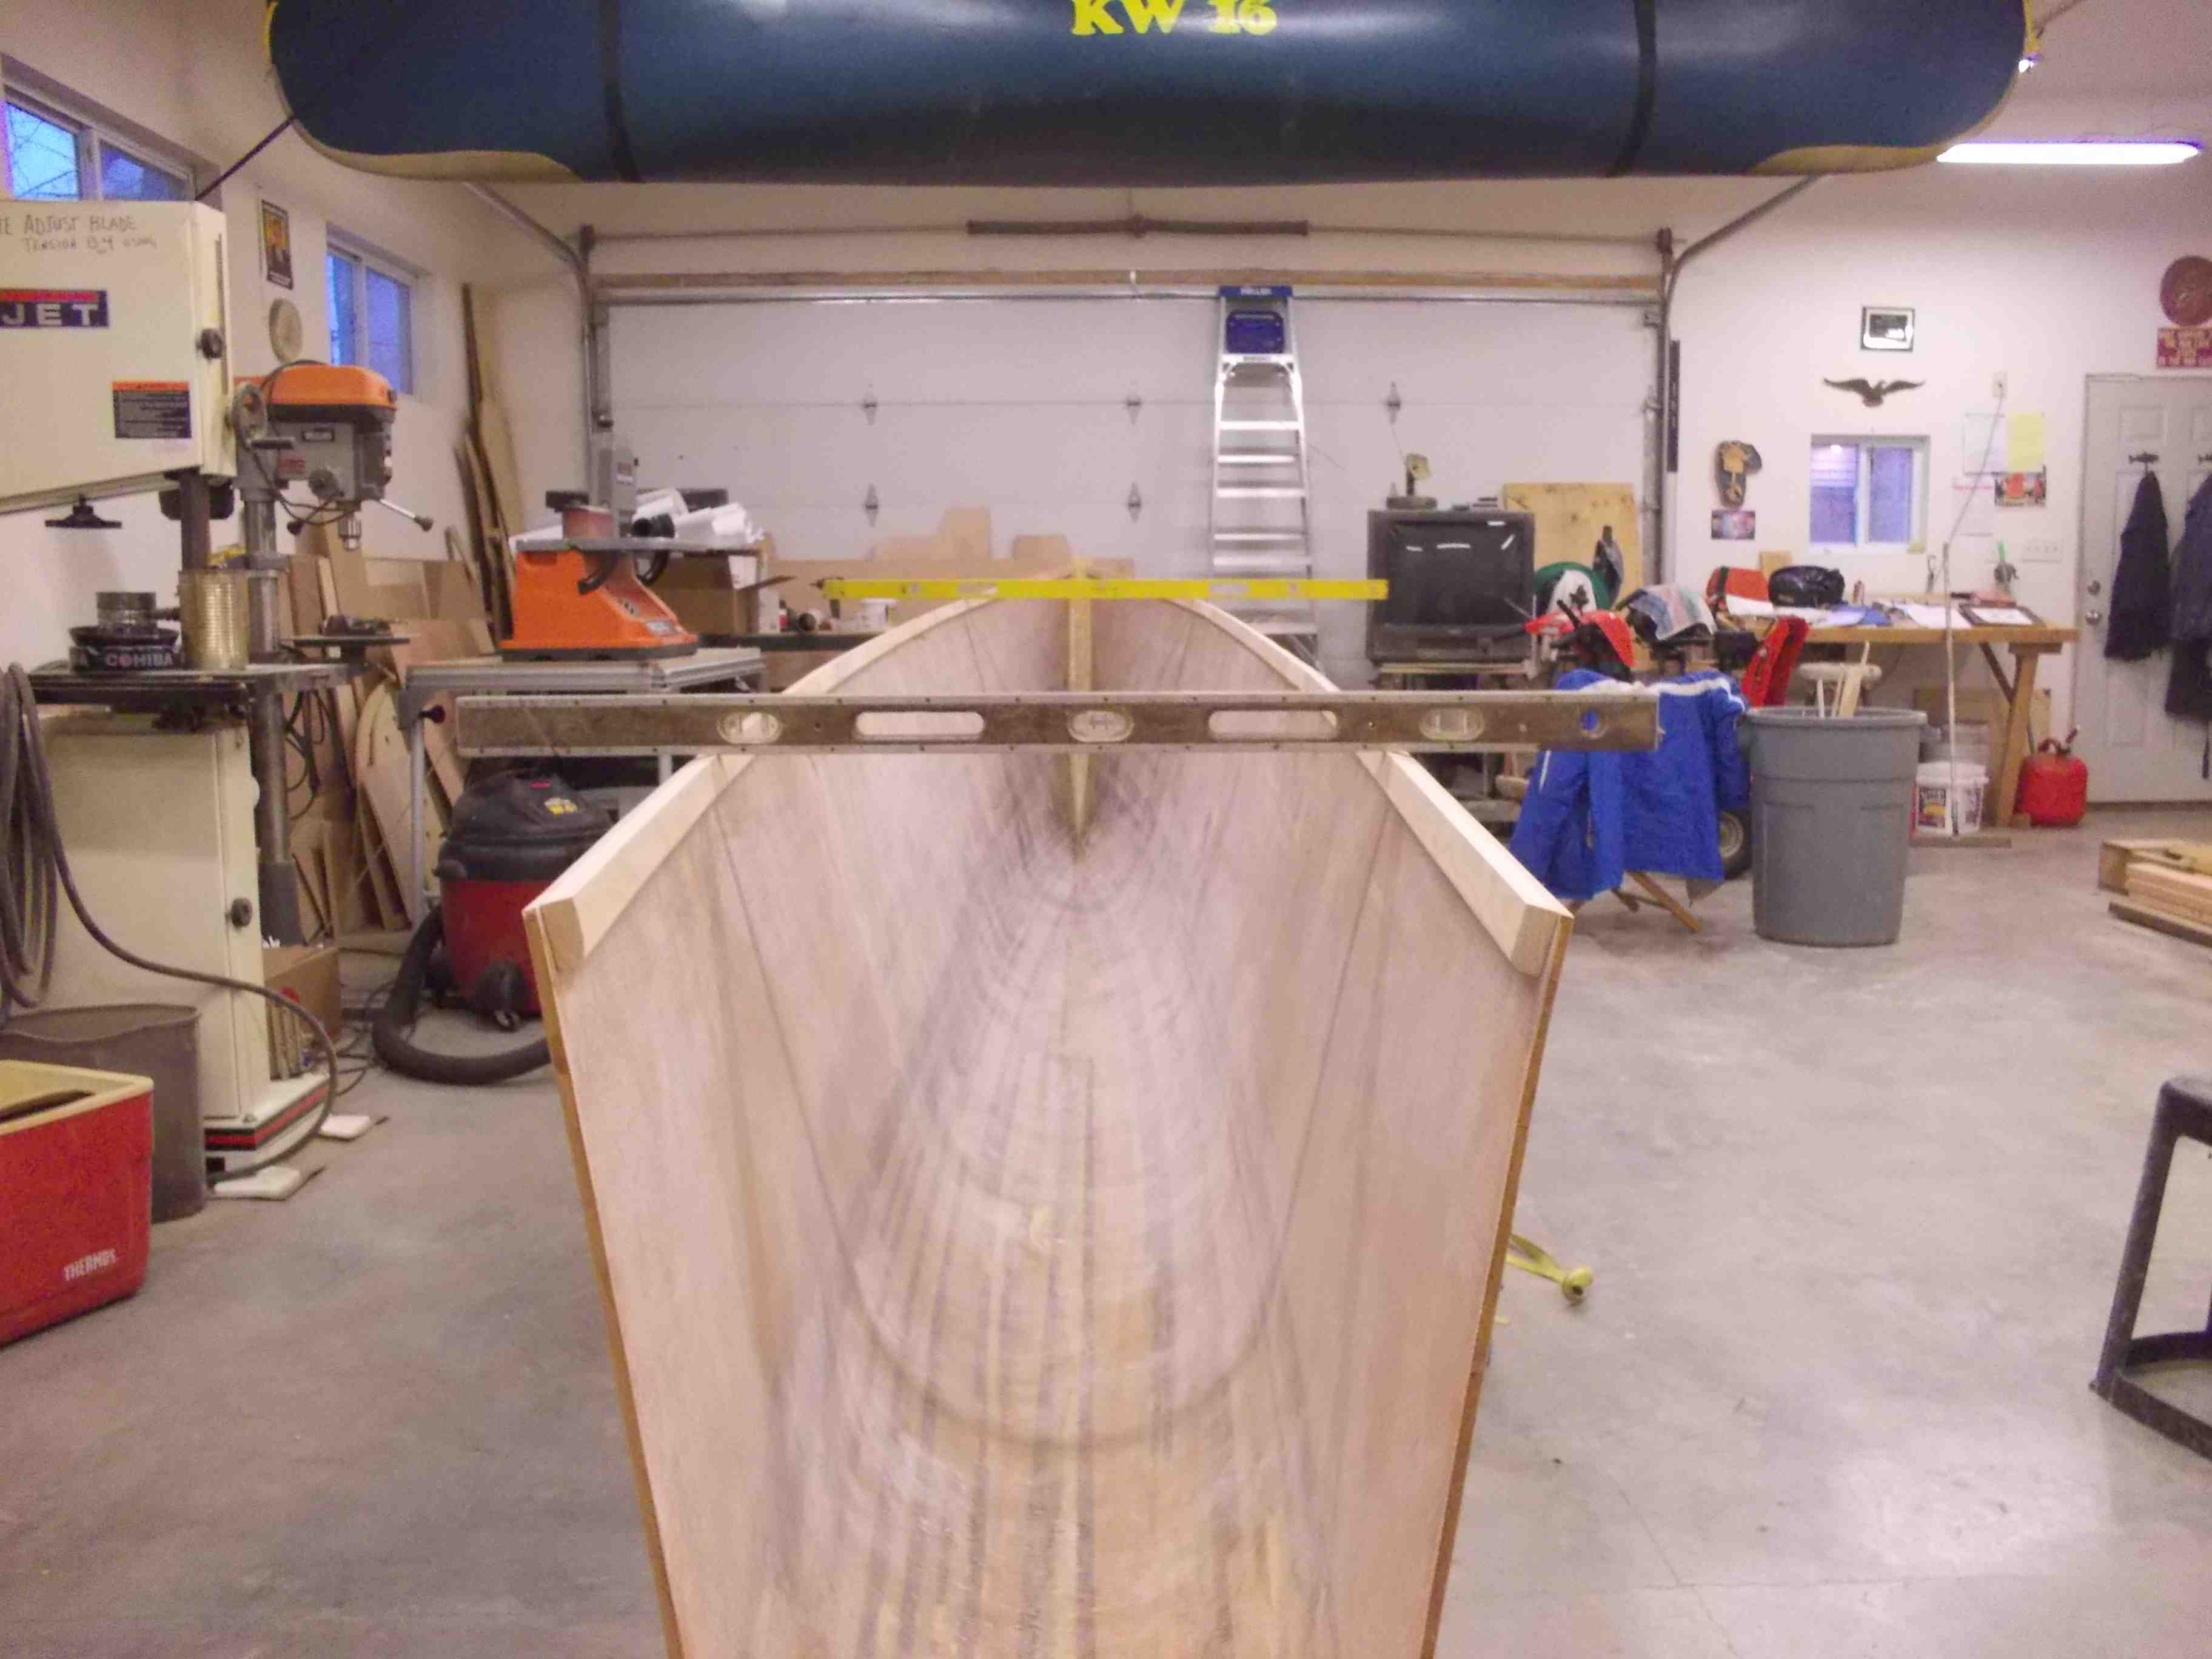
At this point I am super anxious to see if the hull is still true and square. A simple eyeball test tell me that the front and back of the hull have not torqued. If the are crooked, the front and back levels will not align.

There she is! What a beauty! The hull ready for the bulkheads.
